How to Build and Deploy an SEO Website With Kimi K3
A practical Kimi K3 workflow for building an SEO-first website, staging it on Cloudflare, connecting a custom domain, verifying Search Console and avoiding the mistakes that make AI-built sites look good but fail to perform.
You can build and deploy an SEO website with Kimi K3 by using the desktop app with a deliberate SEO playbook, building the site in Astro, reviewing it locally, deploying to a Cloudflare staging URL, then connecting the domain, Google Search Console and analytics. The model can make the first version much faster. It does not remove the work of deciding what pages the site needs, checking the output or improving it after real users and Google interact with it.
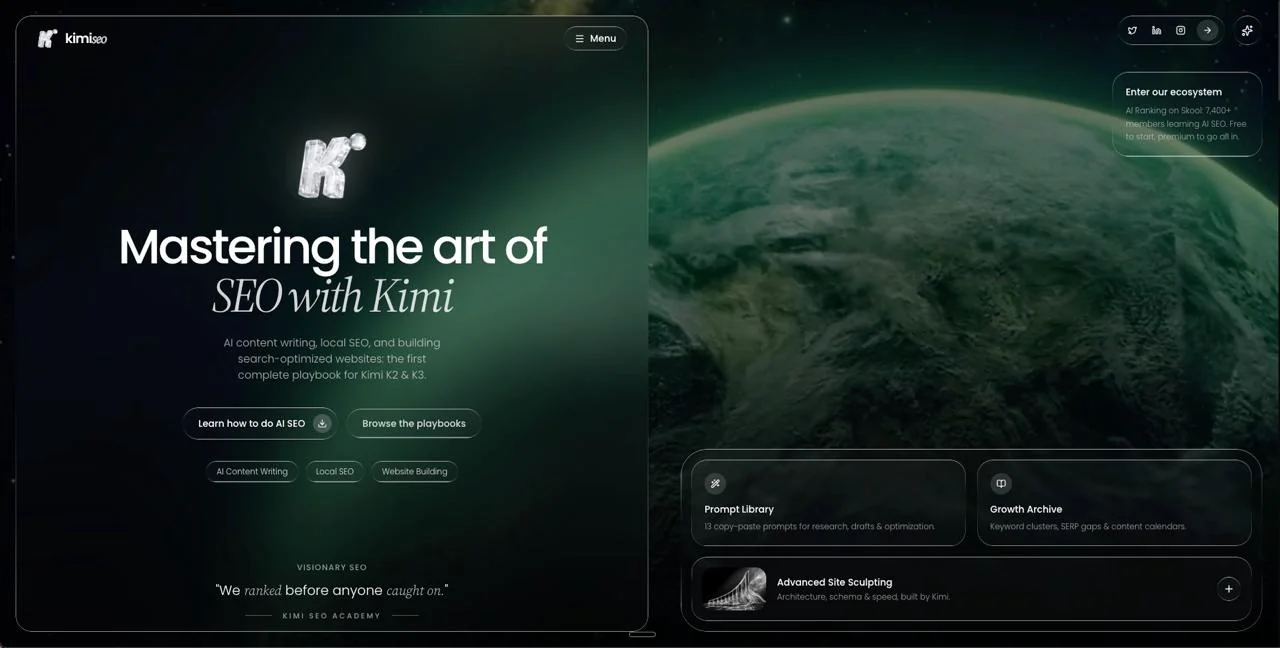
In my Kimi K3 website-build walkthrough, I used Kimi's desktop app, a Cloudflare connection and an SEO playbook file to take a website from prompt to a live domain. The video is 12 minutes long, while the build shown took roughly 20 minutes. That is still quick. The more important lesson is the workflow around the build.
This guide is for business owners, freelancers and agency owners who want to use Kimi K3 to create websites that have a chance of becoming useful SEO assets, rather than attractive one-page demos that disappear into the void after launch.
What the first build achieved
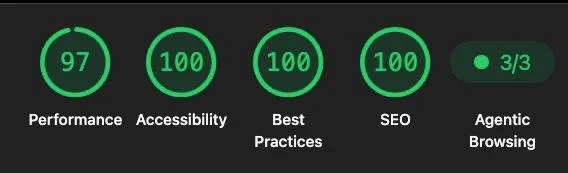
The Lighthouse run for this website reported 97 performance and 100 for accessibility, best practices and SEO, plus 3/3 for agentic browsing. That is a strong technical snapshot, but it is not a ranking promise. The next job is still to validate the pages, search intent, indexing and conversion path.
The Kimi K3 workflow I would use
The useful version of this workflow is not: prompt, publish, pray. It is:
- Choose the business, offer, audience and conversion goal.
- Give Kimi a playbook that tells it how you want SEO handled.
- Build the site in a maintainable framework such as Astro, not only inside an AI-builder preview.
- Review the local preview and fix obvious structure, copy and technical issues.
- Deploy to a staging URL first.
- Connect the real domain only after the site passes review.
- Verify ownership in Google Search Console and install analytics.
- Use actual search and conversion data to decide what to improve next.
That last step is what separates a quick AI build from a real marketing asset. If you need the broader architecture thinking first, read my guide to building website structure for SEO before asking any model to generate pages.
1. Start with the SEO playbook, not the design prompt
Kimi K3 has a large context window and is designed for long-horizon coding and knowledge work, according to Kimi's own K3 documentation. That does not mean it automatically knows your business, your conversion goal or how you want a site structured.
In the video, I start by adding an SEO operating playbook as an MD file. It gives Kimi instructions about the SEO baseline I want before it starts building. This matters because a blank model will otherwise make reasonable-looking assumptions that may be wrong for your niche.
| Give Kimi before it starts | Why it matters |
|---|---|
| Business, offer and target customer | Stops generic copy and helps the model focus on the actual conversion goal. |
| Page map and target search intent | Prevents the classic one-homepage, one-services-page AI site. |
| Brand examples or a reference template | Gives the design direction without asking the model to imitate another site word for word. |
| SEO standards | Sets expectations for titles, descriptions, headings, internal links, image alt text, schema and analytics. |
| Claims to avoid and proof available | Keeps the site credible and reduces invented testimonials, stats or guarantees. |
For a local service business, this is also where you decide which services, areas and proof pages deserve their own URLs. My local SEO guides explain why the structure needs to reflect real services and locations, rather than producing hundreds of thin city pages.
2. Use a good reference, then make it yours
Kimi can start from its own templates, but a reference site or a quality template gallery can help you avoid the default AI look. In the walkthrough, I use a reference to give Kimi a visual direction, then ask it to rebuild that direction for a new agency with its own content and brand.
The rule is simple: borrow the design language, not the copy, brand assets or site structure blindly. A reference can help with pacing, spacing, animation and hierarchy. It cannot tell you which pages your customers need or what you need to say to earn trust.
3. Build in Astro instead of treating the AI preview as the finished website
Kimi has a Websites feature, which is useful for testing an idea or sharing a quick mockup. For a professional website, I prefer asking it to build in Astro so the project is portable, editable and easier to run through a normal build-and-deploy workflow.
Astro's documentation is a good starting point if you have never used it. The important point is not that Astro is magic. It is that you want an actual codebase you can inspect, improve and hand to another developer or agency later.
Before deployment, check the things an AI builder often misses:
- one clear topic and conversion action per important page
- useful page titles, meta descriptions and headings
- logical internal links between services, resources and proof
- unique copy that is specific to the business
- descriptive WebP images with alt text
- contact and conversion paths that actually work
- mobile layout, load speed and accessibility basics
For a fuller launch checklist, use my guide to what to check after publishing. The same principle applies to a website: launching is the beginning of the feedback loop, not the finish line.
4. Deploy to a Cloudflare staging URL before you touch the real domain
In the video, I connect Kimi to Cloudflare so it can deploy the site. That is convenient, but I would not skip the review step just because an agent can attach a domain quickly.
Ask for a staging deployment first. Open the site on desktop and mobile. Check the page titles, headings, forms, images, broken links and the pages you expect Google to understand. Then get a human to review it, especially if the site is for a client.
I also would not make broad Cloudflare access the default. The video demonstrates a fast path, but a safer client workflow is least-privilege access and a clear approval point before a production domain is changed. Cloudflare's Pages custom-domain documentation explains the domain setup requirements, including the extra DNS and nameserver considerations for an apex domain.
5. Connect the domain, then verify Google Search Console
Once the staging version is approved, attach the domain in Cloudflare. If the domain is already in the same Cloudflare account, the setup can be simpler. If it is not, do not guess at DNS records or give an AI agent unrestricted access to a registrar account.
Next, add the website to Google Search Console and verify ownership. In the video, Cloudflare makes this part quick because the site and domain are already managed in the same ecosystem.
There is an important correction here: Search Console verification gives you access to the property's data and controls. It does not make Google index or rank the site faster by itself. Google explains in its site ownership verification guide that verification proves you control the site, and that data can take a few days to accrue.
That means the useful sequence is: verify ownership, submit or confirm the sitemap, inspect important URLs, then improve the pages based on the data you collect.
6. Do not confuse a high Lighthouse score with an SEO strategy
The site in the video scored strongly in Lighthouse, including a 100 SEO score. That is a good quality-control signal. It is not proof the site will rank.
Chrome's Lighthouse performance documentation is clear that the score is a weighted lab measurement and can fluctuate based on testing conditions. Use it to catch technical problems, not as a substitute for keyword research, useful information, internal links, authority and conversion tracking.
| Useful launch signal | What it does not prove |
|---|---|
| High Lighthouse score | That Google will rank the page for a competitive query. |
| Search Console ownership verified | That every URL is indexed. |
| AI-generated page copy | That the page is more helpful than the pages already ranking. |
| Custom domain attached | That the site has tracking, leads or a real SEO growth plan. |
Where Kimi K3 fits, and where it does not
Kimi K3 is an interesting option when you want strong long-context coding ability at a transparent API price. Kimi lists $0.30 per million cached input tokens, $3 per million uncached input tokens and $15 per million output tokens in its official pricing documentation. Pricing and app plans can change, so check the live page before you buy.
My practical take from the build: K3 can produce impressive work and it is a good alternative if cost matters. The drawback is speed. It felt slower than Codex and Anthropic models in the workflow I tested. That does not make it bad. It means it is worth choosing based on your actual bottleneck. If your bottleneck is budget, it may be attractive. If your bottleneck is rapid back-and-forth iteration, test it before moving your whole workflow.
For a broader tool comparison, read my earlier Kimi Code versus Claude Code SEO test.
What to do after the site is live
Do not leave the website alone for 90 days and call that SEO. Set up a simple operating loop:
- Use Search Console to see which pages and queries get impressions.
- Connect GA4 so you can see whether landing pages lead to useful actions.
- Check indexing, crawlability and page experience on the important URLs.
- Improve weak pages with better answers, proof, links and clearer conversion paths.
- Use a tool such as DataWise when you need to organize keyword clusters and content opportunities across the site.
This is the part most AI website videos skip. The AI build is exciting. The SEO operating system is what makes the site more valuable over time.
FAQ
Can Kimi K3 build a complete website?
Yes. Kimi K3 can help plan, code and deploy a complete website, especially when you give it a clear brief, a reference direction and SEO instructions. You still need to review the output, test the site and make the final production decision.
Can Kimi K3 deploy directly to Cloudflare?
With the appropriate Cloudflare connection, it can help deploy a site. Use staging first and keep production-domain changes behind human approval. Do not grant wider account access than the task requires.
Does a 100 Lighthouse SEO score mean a website will rank?
No. It means the site passed the Lighthouse SEO checks in that test. Rankings also depend on whether the pages answer the query well, are indexable, are internally linked, earn trust and satisfy the visitor.
What is the minimum SEO setup after launch?
Verify Search Console, confirm the sitemap and important URLs, install analytics, check that the core pages can be crawled, then review the first search and conversion data before deciding what to improve.
Build faster, but do not skip the boring parts
Kimi K3 makes it much easier to get a professional-looking first version of a site. That is useful. But a website that ranks is built in two phases: the initial build, then the improvement loop based on search data, conversion data and real customer feedback.
If you want help applying that workflow to your own site, join the AI Ranking community. You can also get the Kimi K3 SEO playbook and launch resources linked in the source video.